3D Printing Workflow
So I've been dabbling in 3D Printing this past week after getting my Printxel printer recently. It took me a bit to get things set up correctly. It's not the noob-friendly exercise some folks might have you believe. That said, once you get things working it's pretty amazing. After doing a number of prints of some sample files of varying sophistication, yesterday I did my first from-scratch project. This is an attempt to document the workflow for anyone interested.
We have a series of window screens around the house that suffer from the same broken plastic bracket the joints the aluminum frame pieces. I've been unable to find a replacement so I thought I'd make my own.
First step is to model what you want printed. I used Google's Sketchup, which I'd used before, and is pretty amazing to pick up and play with, even if you have little experience with modeling tools (I spent a lot of time working with Autocad and 3DStudio, but that was ~20 years ago). Sketchup also has really easy to use dimensioning tools, so I could get the model to exactly match what I was measuring on the original with some calipers. Here's a pic of the finished model:

Next step is to export it from Sketchup in .STL format, which can be done via a free plug-in, in order for it to be read by the next step. During output, you specify the format and to keep the dimensions as is in the model (i.e. the above is in millimeters)
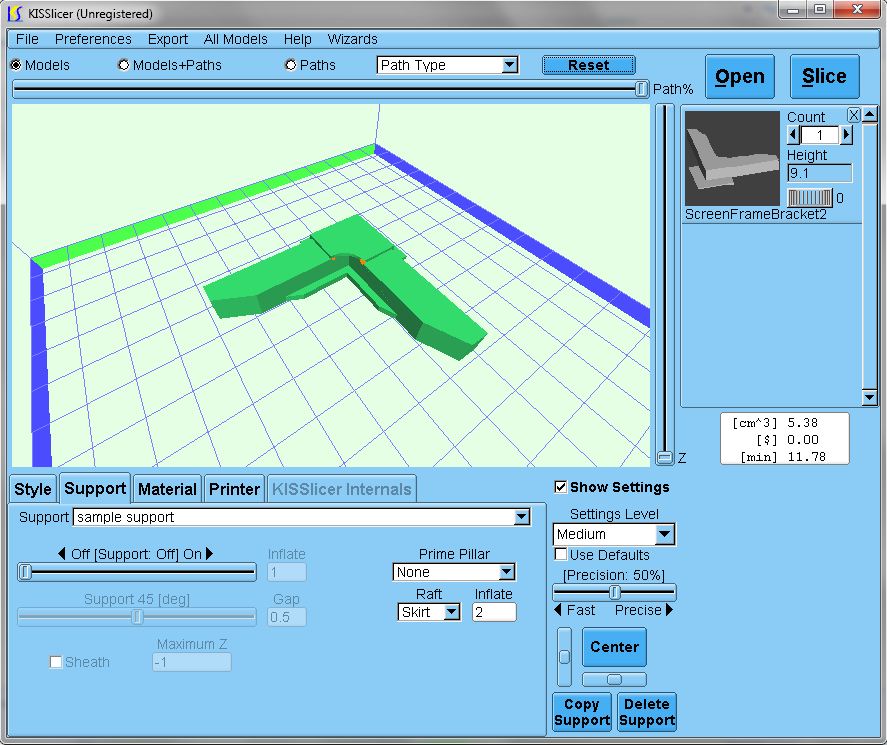
Next, is to import into a program that will 'slice' the model - generate a set of instructions giving the 3D printer path information to construct the model. It's referred to as slicing because the X-Y outlined before the printer moves down in Z, thus doing it in a set of slices. This program does more than just slice the model, it figures out how to fill in the insides of the model to save material, how to build temp supports for overhanging bits, it can build a 'raft' under the model as a starting point, etc. I used KISSlicer. The slicing tool needs to have settings for your particular printer, print material, etc, and these have been set up by Printxel's creator in a bunch of .ini files that are available in the Printxel google group. Here's a pic of the model in KISSlicer.
After using KISSlicer to export the printer instructions as G-Code. I import it into Replicator-G. This is the host software that will control the printer. The screenshot below shows the control panel for heating up the printhead or fine tuning the position of the printer before starting the print. Once it's up to temp, it's ready to go.

Here's short video of it part way through the printing process.
.JPG)
.JPG)

![]() Labels:
3DPrinting,
House,
Kisslicer,
Making,
Printxel,
ReplicatorG
Labels:
3DPrinting,
House,
Kisslicer,
Making,
Printxel,
ReplicatorG


1 comment:
www0413true religion outlet store
nike factory outlet
ray ban sunglasses
ray ban sunglasses outlet
coach handbags
christian louboutin outlet
coach outlet online
ray ban sunglasses
coach outlet
cheap ray bans
Post a Comment